
Huichol Beaded Bowl
Warm your Tackee Wax or Beadswax with your fingers by kneading until soft. Smear (not just press) the wax into the bottom of your gourd bowl, covering everywhere you intend to apply beads. Keep the depth of the wax to about 1/2 of the depth of your beads. This is important! If you have wax any deeper, the beads will sink into it and the wax will ooze up around it…if not today, then sometime in the next 20 years, someone will press the beads enough so that they sink too deep. Ideally you want to be able to see JUST the beads and not the wax between them. If you use a good sticky wax/pine pitch mixture, they will adhere tightly in a shallow coat of wax and cling for many years to come.
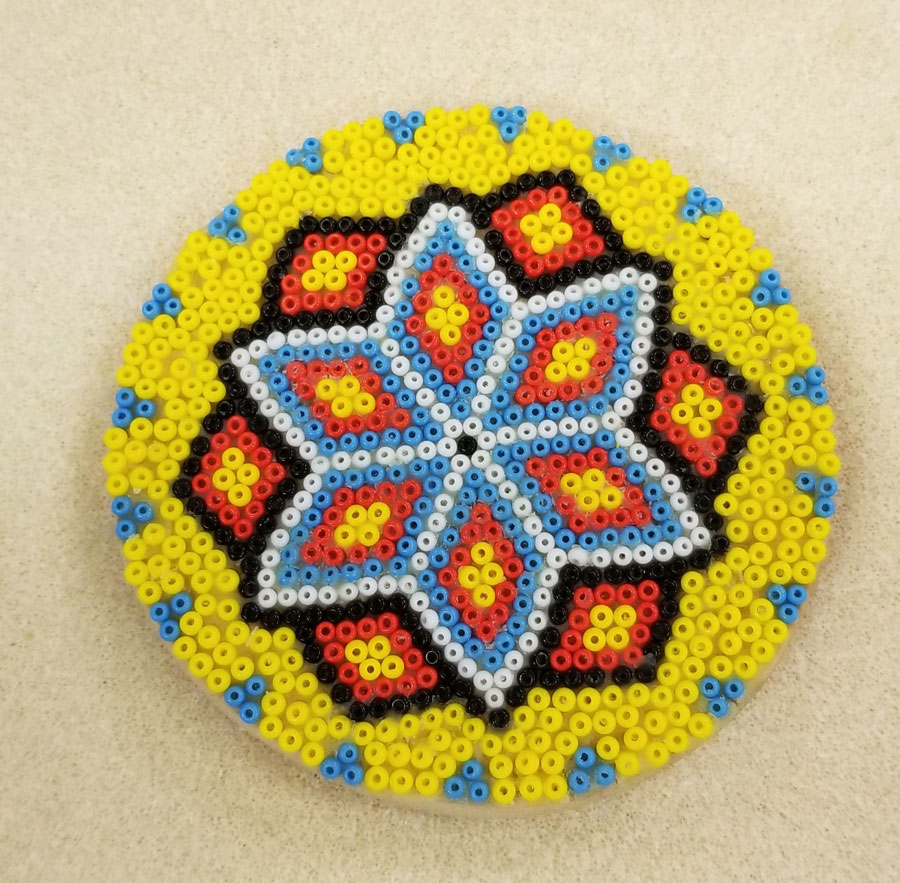 I use size 11 seed beads, but you can use a size smaller or larger if you prefer, just as long as all the beads in a single project are of one size. If you are making a kaleidoscopic design, place your first bead as close to dead center as you can determine; flat, with the hole showing. Six beads make up the first circle/row, snuggling closely around the center bead. From this point on, you are creating a six-sided design. In your mind, draw a line that goes from the center bead, through the center of one of the six beads, and on out to the rim of your bowl. This is an imaginary spoke. You will have six of them. Keeping these six radiating lines in mind will help you to keep your design symmetrical as you work.
When adding the second circle/row of beads, do it in this order. Snuggle a bead close between every two beads in your first circle/row of beads. You should be adding 6 beads. Now add a bead between each of those. You are placing them in the corners. Magically your design will become a six-sided shape with the last 6 beads added. These 6 beads are a part of the imaginary spokes I told you about. You have completed the second circle/row.
From now on, you are adding 6 beads with each circle/row, the same number of beads as the preceding circle/row plus the 6 corners. Keep your spokes (corner beads) in a straight as you work. Things should go smoothly until your bowl shape begins to run uphill. Then it will become more difficult to find room for 6 extra beads each time. Here’s how many of the Huichol beaders from Mexico handle this problem. (I’ve studied their work closely to see how they do it.)
Once you begin to notice overcrowding circle/rows, start bowing your bead lines to make the shape more of a circle instead of a six-sided shape by just adjusting the bead placement. It only takes two lines or rows of beads to accomplish this. Then you will have a round circle to which you are no longer adding 6 beads each time–a straight line that goes around the bowl. Finish the bowl this way. If you need advice about making your beads end precisely at the rim, cleaning up stray wax, or working on non-symmetrical designs, let me know. I’ll be happy to share more. I’m just afraid I’m taking up too much room on the Gourd patch with this answer!
A couple of optional solutions for the overcrowding problem: instead of rounding out the six-sided shape, you can opt to simply leave out a bead on each of the six sides and spread the beads so that the loss isn’t noticeable. This will create more room for your beads. You can do this on several circle/rows if needed. A third option: switch to random placement of beads, snuggling them without regard for lines or symmetry. Many of the pieces coming from Mexico use this technique in difficult areas. Especially when covering clay or paper mache animals!
To insure that your beading extends aesthetically right to the rim without leaving a strip of “naked” gourd, stop about an inch (or a little less) from the rim and work on the area just below the rim instead. Make a band of several decorative circle/rows of beads in coordinating colors. Then return to the original design and work till you meet the band. If one side is a little wider than the other, it’s easy at this point to just add the extra beads it takes to fill it in.
When I’m completely finished applying beads. I do the following step VERY CAREFULLY. Using a heat gun, like the ones for embossing (that don’t blow hard but use medium to high heat), I lightly melt any stray wax that is clinging to the beads. Remember to protect the hand that is holding the gourd from the heat of the heat gun as you work. I use a long oven mitt. A technique that works for me is to turn on the heat gun and wave it slowly back and forth over the area of the gourd I’m warming, being very careful not to get any area hot enough for the wax to run. You can watch the wax turn glassy and sink down into the beads. Blow quickly on it if an area is in danger of flowing. This step firms up the wax a bit, turns it from milky to almost clear, and holds things even firmer than before. This step will NOT correct thick wax if too thick a layer was applied. In fact, beads sitting on a thick layer may drown in the softened wax! This is an optional step. If you work neatly, you probably won’t need to clean up! Beeswax melts at about 145 degrees, so there’s only a small danger that your bowl will ever be damaged by heat.
Nevertheless, I recommend storing your bowl away from sunlight and dust. If you place it where it’s handled a lot, some folks just can’t resist seeing how much effort it takes to move a bead. As a result, I suggest keeping a few extra beads in each color in a small container with a note saying why you are saving them. By the way, the tacky mixture under your beads will remain tacky for years to come, so you can change colors later if you like!
By Kathy James